
Buying a SIM Card and Getting Online in Mumbai: A Practical Guide
Where to buy a Jio, Airtel or Vi SIM in Mumbai, the KYC documents tourists need, eSIM options, the CSMIA airport counter and the cheapest data plans.
'%3E%3Crect%20width%3D'96'%20height%3D'96'%20fill%3D'%23E65100'%2F%3E%3Ccircle%20cx%3D'30'%20cy%3D'24'%20r%3D'44'%20fill%3D'%23fff'%20opacity%3D'.12'%2F%3E%3Ccircle%20cx%3D'60'%20cy%3D'74'%20r%3D'40'%20fill%3D'%23000'%20opacity%3D'.10'%2F%3E%3C%2Fg%3E%3Cg%3E%3Ccircle%20cx%3D'48'%20cy%3D'48'%20r%3D'15'%20fill%3D'none'%20stroke%3D'%23fff'%20stroke-width%3D'3'%2F%3E%3Cpath%20fill%3D'%23fff'%20d%3D'M48%2037%20l3.5%2011%20-3.5%2011%20-3.5%20-11%20z'%2F%3E%3Ccircle%20cx%3D'48'%20cy%3D'48'%20r%3D'2.2'%20fill%3D'%23fff'%2F%3E%3C%2Fg%3E%3C%2Fsvg%3E)
Getting a working Indian number is one of those Mumbai jobs that looks trivial and turns fiddly the moment you land. The good news: the city is extremely well covered, mobile data is absurdly cheap by global standards, and you have more ways to get online here than almost anywhere else on earth. The catch is paperwork. India runs strict, in-person KYC (Know Your Customer) checks on every new SIM, and since 2024 the rules have tightened further. This guide walks you through the realistic options — an eSIM installed before you fly, a SIM grabbed at the airport, or a proper connection from a shop in town — with the exact documents, honest price bands and the small traps that actually catch people out.
Quick reference: your four ways online
| Option | Where to get it | Rough cost | Live in | Best for |
|---|---|---|---|---|
| Travel eSIM (Airalo, Saily, Nomad, Holafly) | Installed from home via app | US$4–25 by data amount | Instant on landing | Data-only, zero India paperwork, short trips |
| Airtel airport SIM | CSMIA Terminal 2 arrivals, near Exit B | ~₹600 for 28 days | 30 min–a few hrs | A real Indian number the minute you land |
| Official Jio / Airtel / Vi store | Every neighbourhood | ₹300–600 for 28 days | 30 min–a few hrs, rarely a day | Smoothest KYC for foreign passport holders |
| Postpaid + doorstep KYC | Operator app, delivered home | ₹400+ per month | 1–2 working days | Long-stayers, expats settling in |
Treat those prices as the realistic 2026 band, not a quote. Prepaid packs move a little each year, and airport packs always sit at the top of the range for the convenience.
The three networks, and which to pick
Practically everyone in Mumbai is on one of three operators: Jio, Airtel or Vi (Vodafone Idea). All three now run 5G across the city, and all three will serve you well across the island, the suburbs and the local-train corridor that most of Mumbai commutes along.
- Jio is the biggest and generally the fastest for raw data, with the broadest 5G footprint. It is the safe default if you mostly want cheap, fast internet and don’t want to think about it.
- Airtel is the other strong all-rounder, often the smoothest for call quality, and — importantly for visitors — the only operator with a counter inside Mumbai airport.
- Vi has thinner national reach but stays genuinely competitive in Mumbai, historically one of its home circuits. Fine if someone hands you a Vi SIM; not worth hunting one down.
For a short trip, network choice barely matters — all three light up the tourist map, from Colaba to the Gateway to Bandra to the airport belt. For a longer stay, or if you’ll travel out to places like Lonavala, Alibaug or Nashik at weekends, lean Jio or Airtel for the wider rural coverage once you leave the metro.
A word on coverage inside Mumbai
Signal in the open city is excellent. Where it gets patchy is predictable: deep inside old stone buildings in Fort and Colaba, in the lower basements of the big malls, on some stretches of the underground Metro, and — inevitably — packed into a rush-hour local where a few thousand phones are fighting for the same tower. None of this is an operator problem you can shop your way out of. If you rely on data for maps while getting around Mumbai, download an offline map of your area on day one and stop worrying about the dead spots.
The fastest route: an eSIM before you fly
If your phone supports eSIM (most iPhones from the XS onward and recent Android flagships do), the least painful option by a distance is to install a travel eSIM before you leave home. Providers such as Airalo, Saily, Holafly and Nomad sell India data plans that ride on Jio or Airtel’s networks but are sold internationally, so they sidestep India’s local KYC and the “local reference” hassle entirely. You install and pay at home, and the plan switches on with data the moment your phone connects after landing — often before you’ve cleared the immigration queue.
Rough pricing at the time of writing: Airalo India plans start around US$4–5 for a few gigabytes, Saily is often the cheapest per gigabyte (roughly US$20 for 10GB), and Holafly sells unlimited-data day passes from about US$6–10 a day for heavy users. The trade-off is real and worth understanding: most travel eSIMs give you data only — no Indian phone number for calls or, crucially, for the SMS one-time-passwords (OTPs) that Indian apps, banks and even some restaurant Wi-Fi logins fire off. That is usually fine, because you’ll make voice and video calls over WhatsApp anyway, and you keep your home number reachable for OTPs on that account.
The hybrid most seasoned travellers actually use
Land on a travel eSIM for instant, no-paperwork internet — enough to book a cab, message your hotel, and load maps for the ride into town. Then decide at leisure, over your first coffee, whether you also want a local SIM with a proper Indian number. If your trip is three or four days of sightseeing, you may never bother. If you’re here for two weeks, staying longer, or need to receive Indian OTPs, add a local SIM once you’re rested. This split means you are never stranded without data at the arrivals hall, which is the whole point.
Buying a SIM at Mumbai airport
The Airtel counter, CSMIA Terminal 2 (arrivals)
This is the only walk-up option on arrival. In the international arrivals hall of Chhatrapati Shivaji Maharaj International Airport (CSMIA) Terminal 2, there is an Airtel booth near Exit B. Jio and Vi do not sell at the counter here, so if you want a physical SIM the minute you land, Airtel is it. (Matrix Cellular, a travel-SIM reseller, also has an airport presence, but its counter sits in the departures area past immigration, and its premium plans are pitched at outbound international travellers — so it is not a realistic option when you’re arriving.)
The headline tourist pack is a 28-day plan for around ₹600, giving roughly 1.5GB of data a day plus unlimited local calls. It is a little marked up — the same plan is cheaper if you activate a basic SIM and top up later through the Airtel app — but you’re paying for convenience and near-instant activation at the one moment you most want to be online.
Practical tips for the counter:
- Carry a printed passport photo and some cash. Card machines at the booth are temperamental, and having a physical photo saves a wait.
- The booth broadly tracks flight timings but is not reliably staffed through the small hours. If you land on a red-eye at 3am, don’t count on it. Plan to run on your eSIM or hotel Wi-Fi overnight and sort the SIM the next morning.
- Check the number works before you walk away. Ask the agent to confirm activation, or send yourself a test message. Sorting a dud SIM is far easier while you’re still standing at the counter than from your hotel later.
If you’re arriving very late and don’t fancy any of this, it’s often simplest to book a hotel near the airport for the first night, sleep, and handle connectivity fresh in the morning at a proper store.
Buying a SIM in the city
Away from the airport, you have three routes: an operator’s own store, a big electronics chain, or a neighbourhood mobile shop. For a foreigner, they are not equal.
Official Jio, Airtel and Vi stores (citywide)
There are branded stores in virtually every neighbourhood — Bandra, Andheri, Lower Parel, Colaba, Dadar, Powai and beyond — and you can find the nearest My Jio Store, Airtel store or Vi store through each operator’s store-locator or app. An official store is the smoothest place for a foreigner to complete KYC, because the staff deal with tourist documents regularly and the activation is done correctly the first time. This matters more than it sounds: the single biggest cause of a SIM never going live is a small paperwork error at a shop that rarely handles foreign passports.
Practical tips:
- Go in the morning if you can. Verification sometimes needs a follow-up tele-verification call or SMS to complete, and you want that finished well before the shop’s evening rush — and before you’ve moved on to another part of the city.
- Pick a store near where you’re based. If you’ve sorted out where to stay, there’s almost certainly a branded outlet within a ten-minute walk or a short auto ride. There’s no advantage to trekking across town.
- Give it your honest length of stay. The validity of a tourist connection is tied to your visa, so let them set it correctly rather than discovering a cut-off later.
Reliance Digital and Croma (malls citywide)
The big electronics chains — Reliance Digital (which sells Jio) and Croma — carry SIMs alongside phones and are a convenient one-stop if you’re also buying a device or a cheap local handset. You’ll find both in most of the large malls across the suburbs. The KYC process is the same as at an operator store; the advantage is simply that you can walk out with a phone and a connection in one trip. Handy if you’ve decided you’d rather keep your main phone on your home eSIM and run the Indian SIM in a cheap second handset.
Lamington Road and the neighbourhood shops
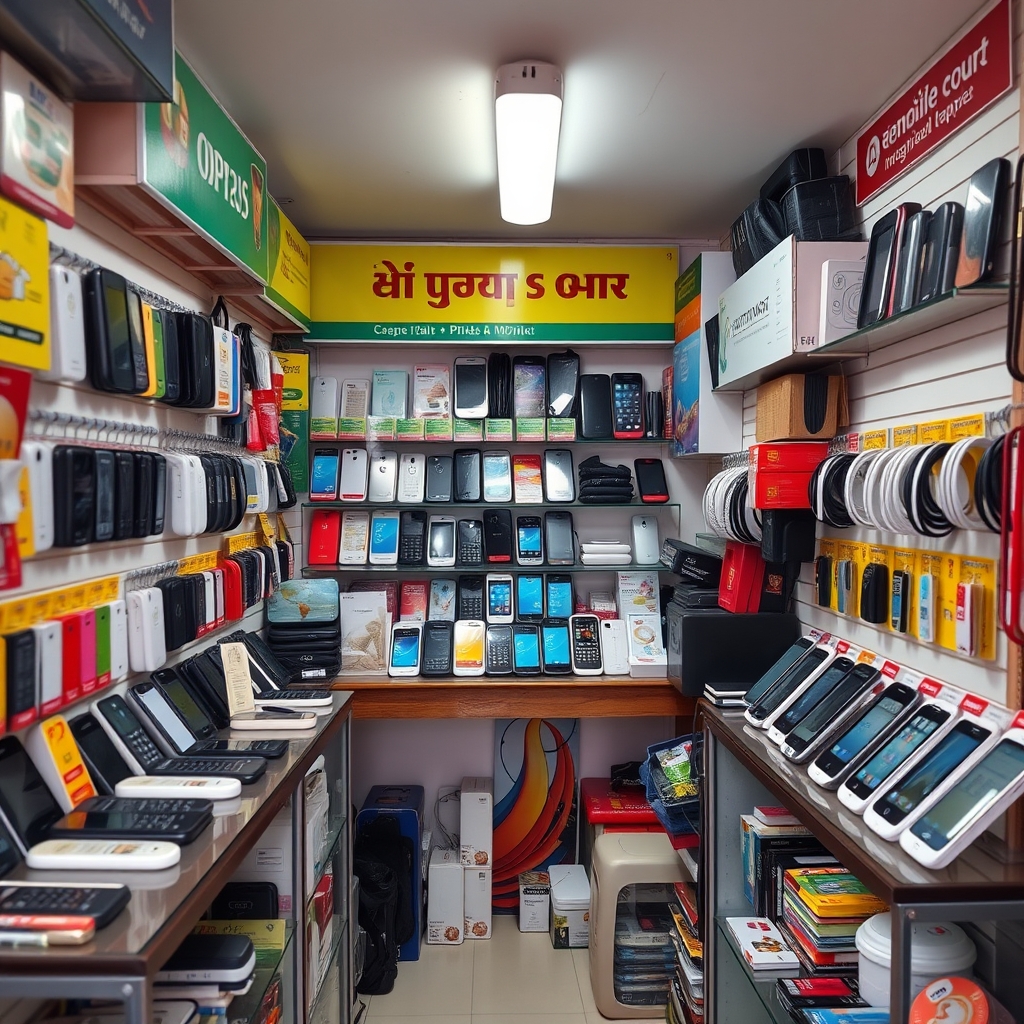
Lamington Road (officially Dr Dadasaheb Bhadkamkar Marg), a short walk from Grant Road station in South Mumbai, is the city’s sprawling electronics bazaar — hundreds of shops selling phones, components and accessories, typically open around 11am to 8pm and shut on Sundays. It’s the place to pick up a cheap handset, a case, a power bank or a cable at keen prices; our full Lamington Road buyer’s guide covers how to shop it and dodge the fakes.
One firm rule: buy the SIM itself from an authorised operator counter, not from a random stall. An improperly registered SIM can be delayed, blocked, or tied to someone else’s paperwork — and unpicking that as a visitor with a flight to catch is a genuine headache. The clean division of labour is simple: use Lamington Road and the local shops for hardware, and take the connection itself from an official store or a recognised operator point. The same goes for the small mobile-recharge shops you’ll see on every lane; they’re perfect for topping up an existing number but not the place to register a fresh foreign KYC.
Documents and KYC: what to carry
For a foreign passport holder, expect to hand over:
- Your passport (the original, not just a copy).
- Your visa — an e-Visa printout is accepted.
- One or two passport-sized photographs.
- A local address in India — your hotel’s name, address and phone number are normally accepted, which is one more reason to have your booking sorted before you buy.
Some outlets also want a photocopy of the passport photo page and the visa page, so carry a couple of copies each. A cheap little folder of copies plus two spare photos is the single best thing you can prepare before you land; it turns a twenty-minute form-fill into a five-minute one.
A few things it genuinely helps to know:
- Manual KYC applies to foreigners. The Aadhaar-based instant eKYC that residents use is not available to you, so a foreigner’s verification is done by hand and takes a little longer. This is normal, not a sign anything is wrong.
- Activation is not instant. A new connection usually needs a tele-verification step — often a short call or an SMS to a number like 59059 — before outgoing calls and data go fully live. Budget anywhere from 30 minutes to a few hours; occasionally it stretches to a day. Keep the SIM in a phone and powered on while you wait.
- Validity is capped. Tourist connections are typically issued with validity tied to your visa, or up to 90 days, whichever is shorter. You won’t get a year-long tourist SIM.
- The “local reference” snag. Because sellers now carry heavy liability for mis-registered SIMs, some ask for a local Indian contact’s number. This is reported more often in Delhi than in Mumbai, and here a hotel address and number usually suffice — but if one shop turns awkward about it, don’t argue. Simply walk to an official operator store, which is used to tourists and will process you on hotel details alone.
The best data plans right now
Once your SIM is live, do all your recharges through the operator’s own app rather than a shop — it’s cheaper, and you can see exactly what you’re buying. Indicative prepaid plans, all of which bundle unlimited local calls and generous 5G in Mumbai:
- Jio: around ₹299 for 1.5GB/day over 28 days, ₹349 for 2GB/day, or an annual ₹3,599 pack with roughly 2.5GB/day for a full year — genuinely excellent value if you visit India even once or twice a year and want to keep the number alive between trips.
- Airtel: broadly similar, with 28-day packs in the ₹300s and longer 84-day options that work out cheaper per day if you’re staying a couple of months.
- Vi: a ₹365-ish pack gives about 2GB/day for 28 days with unlimited calls.
For most visitors, a single 28-day pack is far more data than you can realistically burn through — 1.5GB a day comfortably covers maps, WhatsApp calls, ride-hailing, streaming music and a fair bit of video. If you’re planning to tether a laptop and actually work from a work-friendly café or your hotel, step up to a 2GB/day pack or lean on café and hotel Wi-Fi for the heavy lifting; big software updates and video uploads eat a daily allowance fast.
For expats and long-stayers
If you’re settling in rather than passing through, the calculus changes. Once you have a longer-term local address — the kind you’ll set up when you get around to renting a flat — and, ideally, an Aadhaar or a long-stay visa, a postpaid plan starts to make sense. Postpaid gives you a stable number, cleaner billing, and usually better priority on the network. All three operators offer free home delivery of SIMs with doorstep KYC booked through their apps: an agent comes to you, checks your documents on the spot, and the connection goes live within a day or two.
If you already hold an Indian number — say you’re moving from another city, or upgrading an old tourist SIM — and want to switch networks without losing it, use MNP (mobile number portability). SMS the word PORT followed by your number to 1900, collect the unique code you get back, and take that code plus your documents to the new operator. The switch typically takes a few working days and you keep your number throughout. It’s worth doing if your current network is weak where you’ve ended up living, since coverage can vary street to street across the suburbs.
One modern wrinkle worth knowing: WhatsApp and similar apps register against the SIM in your phone, and India has been steadily tightening rules that tie such apps to an active, verified SIM. In practice, the rule of thumb is simple — keep the SIM you registered WhatsApp (and any banking or OTP-driven app) on active if you rely on it for messages and one-time passwords. Letting a number lapse can quietly cut you off from an account you assumed was safe.
The bottom line
For a short visit, the frictionless play is a travel eSIM installed before departure, so you land already online, topped up with an Airtel airport SIM only if you specifically want a genuine Indian number for calls and OTPs. For a longer stay, walk into an official Jio or Airtel store with your passport, visa, a photo and your hotel address, go in the morning, and you’ll usually be fully online within the hour. Buy your hardware at Lamington Road or a local shop if you like the prices, but always take the connection itself from an authorised counter — that one discipline saves nearly every SIM horror story you’ll read online. Get past the paperwork and Mumbai rewards you handsomely, with some of the cheapest, fastest mobile data anywhere in the world. The forms are the only genuinely hard part, and now you know exactly how to clear them.
Frequently Asked Questions
Can I buy a SIM card at Mumbai airport the moment I land?
Yes. Airtel runs a booth near Exit B in the international arrivals hall of CSMIA Terminal 2, and it is the only walk-up SIM counter on arrival. The headline tourist pack is around ₹600 for 28 days with roughly 1.5GB a day and unlimited local calls. The catch is that the booth is not reliably staffed through the small hours, so if you land on a late red-eye, plan to use a travel eSIM or hotel Wi-Fi overnight and buy your SIM the next morning.
What documents do foreigners need to buy a SIM in Mumbai?
Carry your original passport, your visa (an e-Visa printout is accepted), one or two passport-sized photographs, and a local Indian address — your hotel's name, address and phone number are normally fine. Some shops also want photocopies of your passport photo page and visa page, so bring a couple of copies of each. Foreigners go through manual KYC rather than the instant Aadhaar-based verification residents use, so activation takes a little longer and may need a tele-verification call or SMS before data and calls go fully live.
Is a travel eSIM better than a local SIM for a Mumbai trip?
For a short trip, often yes. International travel eSIMs from providers like Airalo, Saily, Nomad or Holafly install from home, need no Indian KYC, and switch on with data the moment you land — prices run from about US$4 for a few gigabytes up to unlimited day passes around US$6–10. The trade-off is that most give data only, with no Indian phone number for calls or SMS OTPs. Many travellers use a hybrid: land on the eSIM for instant internet, then add a local Airtel or Jio SIM later only if they need a real Indian number.
How much does a month of mobile data cost in Mumbai?
Very little by global standards. A 28-day prepaid pack with 1.5GB to 2GB per day and unlimited local calls costs roughly ₹300–600 depending on the operator, and Jio, Airtel and Vi all sit in that band with full 5G in the city. Recharge through the operator's own app rather than a shop, as it is cheaper and clearer. Airport tourist packs sit at the top of that range because you are paying for instant activation and convenience.
Which network is best in Mumbai — Jio, Airtel or Vi?
For most visitors it barely matters, as all three cover the tourist map and the suburbs well with 5G. Jio is the biggest and usually fastest for raw data with the widest coverage, making it the safe default. Airtel is the strongest all-rounder for call quality and is the only operator with an airport counter. Vi stays competitive within Mumbai but has thinner reach elsewhere. For a longer stay or weekend trips outside the city, lean Jio or Airtel.
Where should I not buy a SIM card in Mumbai?
Avoid buying the SIM itself from random stalls at electronics bazaars like Lamington Road or from small recharge kiosks. An improperly registered SIM can be delayed, blocked, or tied to someone else's paperwork, and fixing that as a visitor is a real headache. Use those shops for hardware — cheap handsets, cables, power banks — but always take the connection itself from an official Jio, Airtel or Vi store, a Reliance Digital or Croma, or the airport Airtel counter, where foreign KYC is handled correctly the first time.